A Guide To The Interface
The Bitmap Font Creator has been designed to be fairly intuitive to use.
Here is a quick introduction to the interface and a brief rundown of the features available to you.
The Font Tab
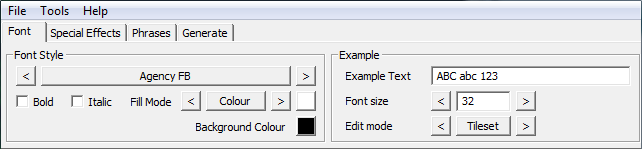
The font tab is the start point of the BMFC, it is split into two areas; The Font Style panel and the Example Panel.
The top row of buttons in the Font style panel allow you to choose which font you are using.
The left and right arrows cycle up and down through the list of installed windows fonts, and the long button with the current font name in it will bring up the Font Requester.
The next row contains tick boxes to select Bold or Italic text, and then the controls to allow you to change the Fill Mode.
BMFC has 3 Fill Modes, Colour, Gradient and Texture. You can select which fill mode is used by using the left and right arrow buttons either side of the Fill Mode indicator. The current Fill mode is also shown at the bottom of the window in the status bar. The last Fill Mode control is the fill selector. This brings up a different requester depending on which Fill Mode is selected.
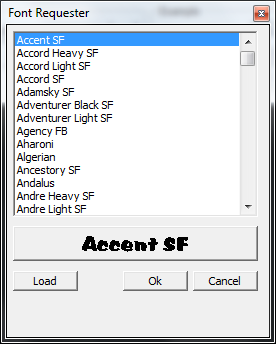
The font requester offers a preview of the highlighted font, and the ability to load in a .ttf font file which has not been installed on the computer.
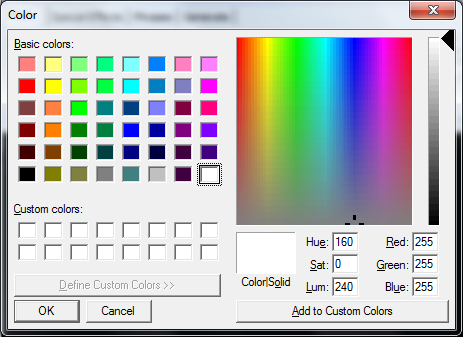
If the Fill Mode is set to "Colour", then pressing the Fill selector button will bring up this requester.
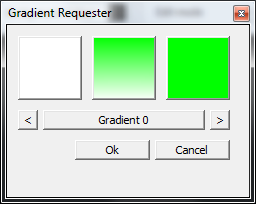
If the Fill Mode is set to "Gradient", then pressing the Fill selector button will bring up this requester.
It allows you to choose the two colours for the gradient by pressing one or other of the solid colour buttons on either side of the example gradient image.
The Left and Right arrows below allow you to change the gradient used.
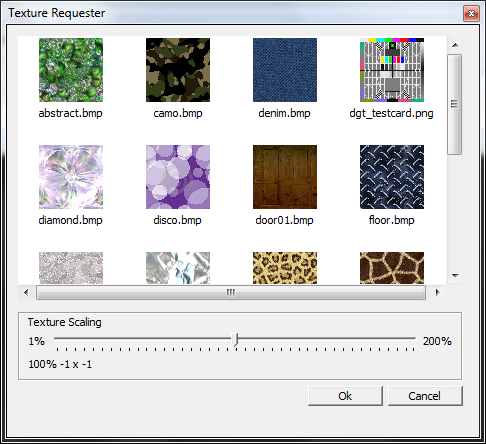
If the Fill Mode is set to "Texture", then pressing the Fill selector button will bring up this requester.
You can browse the contents of the selected Textures folder, as well as change the scale of the texture used.
The Special Effects Tab
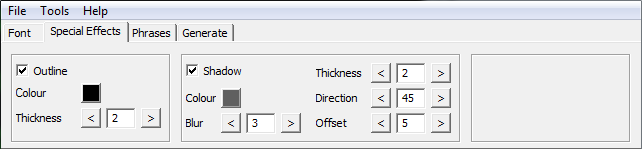
The Special Effects tab if where you can control the outline and the shadowing of your bitmap font.
The first panel is the Outline panel. The tick box selects whether outline is drawn or not. Pressing the colour button brings up the colour requester and allows you to choose the colour of the outline. The third row of controls are for the thickness (in pixels) of the outline. You can increase or decrease the amount by pressing the arrow buttons, or enter your own value directly.
The second panel is the Shadow panel. Again the tick box selects whether the shadow is drawn or not. The colour and thickness controls are exactly the same as the Outline panel as well. However you also have a few extra controls allowing you to change the angle, level of blurring and offset (Distance from text)
The third panel is the Sparkles panel (Name subject to change) and is a feature still under development.
The Phrases Tab
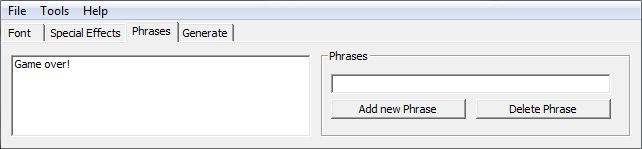
A phrase is a sentence pre-rendered onto an image, rather than constructed at runtime by your program from the tile set. This is useful for game titles and credits, as well as website design,

An example of a Phrase.
You can add a new phrase to the list by typing into the white box in the Phrases panel on the right, and then pressing the Add new Phrase button or by pressing [Return] on your keyboard.
Once added, your phrases are displayed in a list on the left. You can select a phrase from this list by clicking on it and the pressing the Delete Phrase button.
The Generate Tab
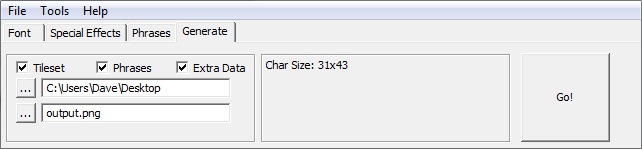
The Generate tab is the last of the four tabs on your Bitmap fonts creation. From here you can choose the output path and filename, as well as which elements (Tileset, Phrases and Extra Data) are outputted. The tile set is a 10 x 10 grid of characters. Phrases are saved as individual files and are named the same as the output file name but with "PhraseN" appended. (Where N is a number), and the Extra Data is a .txt file detailing the positions and sizes of the letters in the tileset to make it easier to use them inside programs.
The next panel displays information and statistics about your Bitmap font. This currently only display an approximate character size, but is a feature due improving in upcoming versions.
The last control is the Go! button. Pressing this will cause BMFC to render all the elements selected. This can take a few moments to complete, and is indicated by the progress bar.
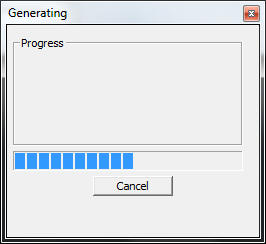
The Generating progress dialogue.
The Options Dialogue
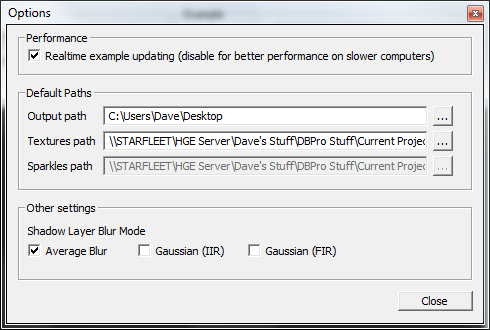
Accessible from the tools menu, this dialogue allows you to customise BMFC to better suit your needs.
On slower computers, you can enhance performance by disabling real-time example rendering. This causes BMFC to only update what you see on the screen every few seconds
From the Default Paths panel, you can change the path of the output generated, as well as which folder is used for textures and sparkles. (N.B. There is a limit on the number of textures supported per folder of about 4500 to 5000)
The Other settings panel has options to change the method used to blur the Shadow layer.
Back