Quick Start Guide
This chapter is a quick and dirty how to use the Atlas Image Data Generator to create a sub image data file. What all the controls and options do is explained in much more depth in the next chapter.
Upon opening the app, you will be presented with a screen like this. The first step is to load in the image containing all the sub-images. This is done using the highlighted controls.
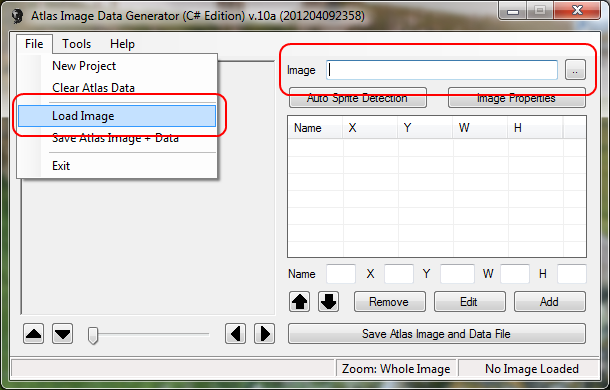
The Atlas Image Data Generator supports images with the following formats:- .bmp, .gif, .jpg, .png and .tif
Once you have selected and loaded in an image, you will be presented by the Image Properties Dialogue box. This details various things about the image loaded in. Be sure to check that the Background Colour has been detected correctly (if not, you can change it to the correct one by pressing the Edit button, highlighted).
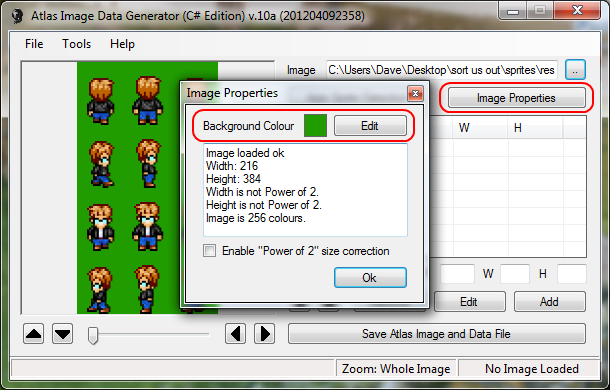
You can reopen the Image properties dialogue box at any time by pressing the Image Properties button also highlighted in the above image.
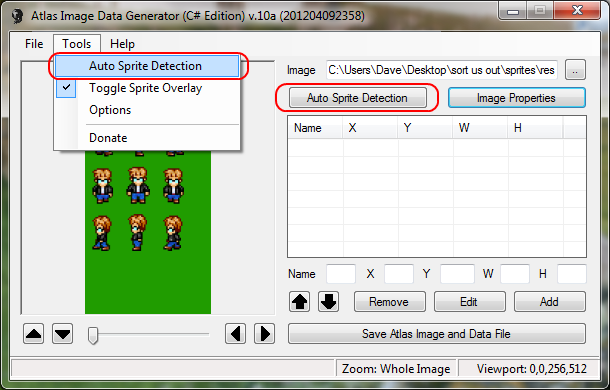
The next step is to run Auto Sprite Detection, by pressing either of the controls highlighted in the image above. Processing the image may take up to a few minutes depending on the size of the image loaded and the number of sub-images it contains.
![]()
Next you are presented with the Sprite Sizing dialogue box, here you can select whether your sprites are all the same size (e.g. frames of an animation) in which case padding is added to each of the sprite boundaries to make them all the same size; or whether they are all different sizes, in which case no padding is added.
You can also adjust where the sprite appears inside the padded boundary.
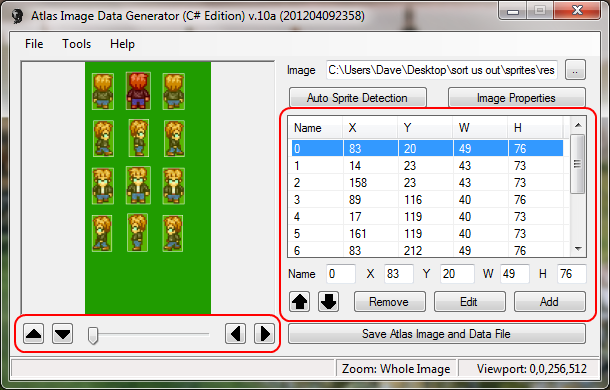
Once the sprite detection has finished, all the detected sprite positions are displayed and are available for editing using the controls highlighted on the right of the above image.
You may also zoom into the image and scroll around it using the left hand set of highlighted controls.
Once you have edited the list to perfection it's time to save your work. This is done by simply pressing either of the controls highlighted in the picture below.
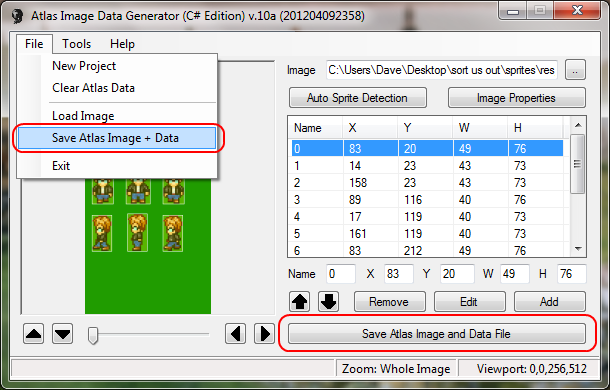
This will give you the option to re-save the image file, as well as the sub image data file.
Congratulations, you have just created your first Atlas Image and data file.
Back